As an avid collector of classic retro computers from the 80s and 90s I am on the regular lookout for the common problems that can occur with these computers over time, especially with parts that involve leaking capacitors, batteries or more notoriously, moving parts such as with floppy and hard disk drives.
Dorm Room Computing

Western Washington University
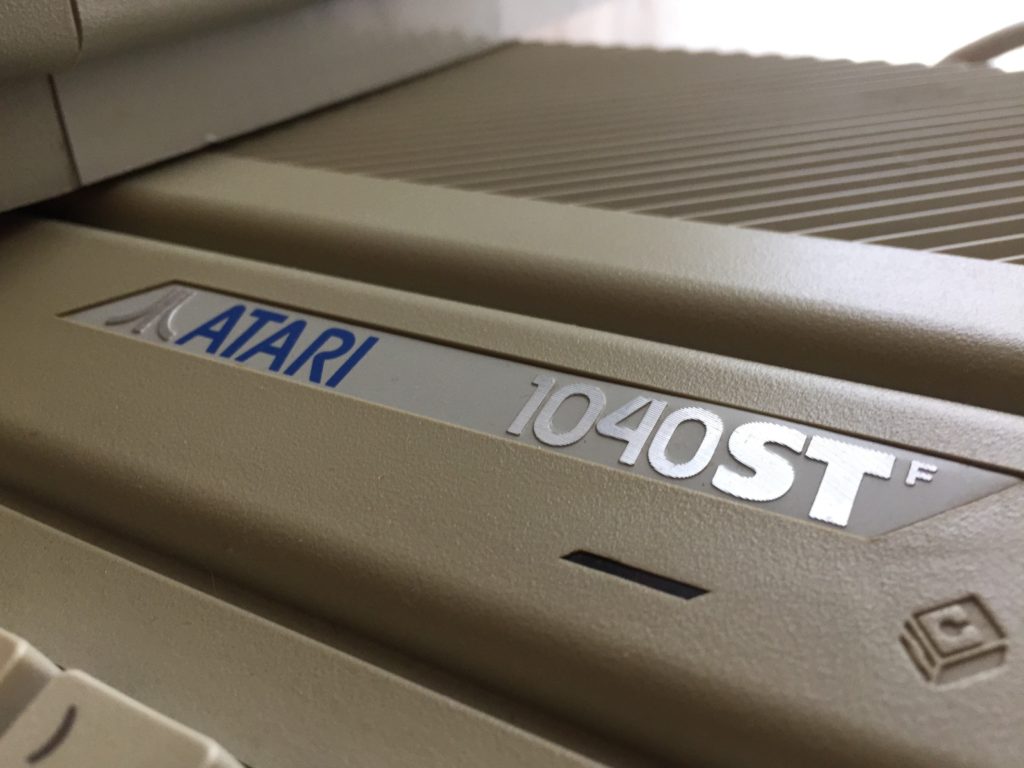
One of my many favorites classic computers (to be honest they are all “my favorites”) is the Atari 1040 ST. The model I have is actually the 1040 STF where the F stands for Floppy Drive which it has built into the base unit. This computer is similar to my original 1985 Atari 520 ST that I used as my primary computer during my sophomore year of college at Western Washington University for everything from writing papers to writing code. The 1040 ST has double the RAM of the 520 ST with a whopping 1 MB. This was back in the days when the IBM PC set the standard of 640K and while a paltry amount of RAM today, it was was like an Ocean of memory to use when you compared it to the duck pond sized 64KB on my TRS-80 or the shot glass of space provided by my Sinclair ZX81 with 1 KB (yes, 1024 bytes to write BASIC code in. Thank god for 16K add-on memory packs!)
So while I didn’t keep my 520 ST back in the day (had to sell it to help pay for my next computer!), it was one that I fondly remembered and enjoyed using every day I had it. So when I had the chance to scoop up this 1040 ST on eBay a few years back, I jumped at it. Then as the years went on and few moves later, I got the chance to resurrect it from the storage boxes and share it with my youngest son Tiger.
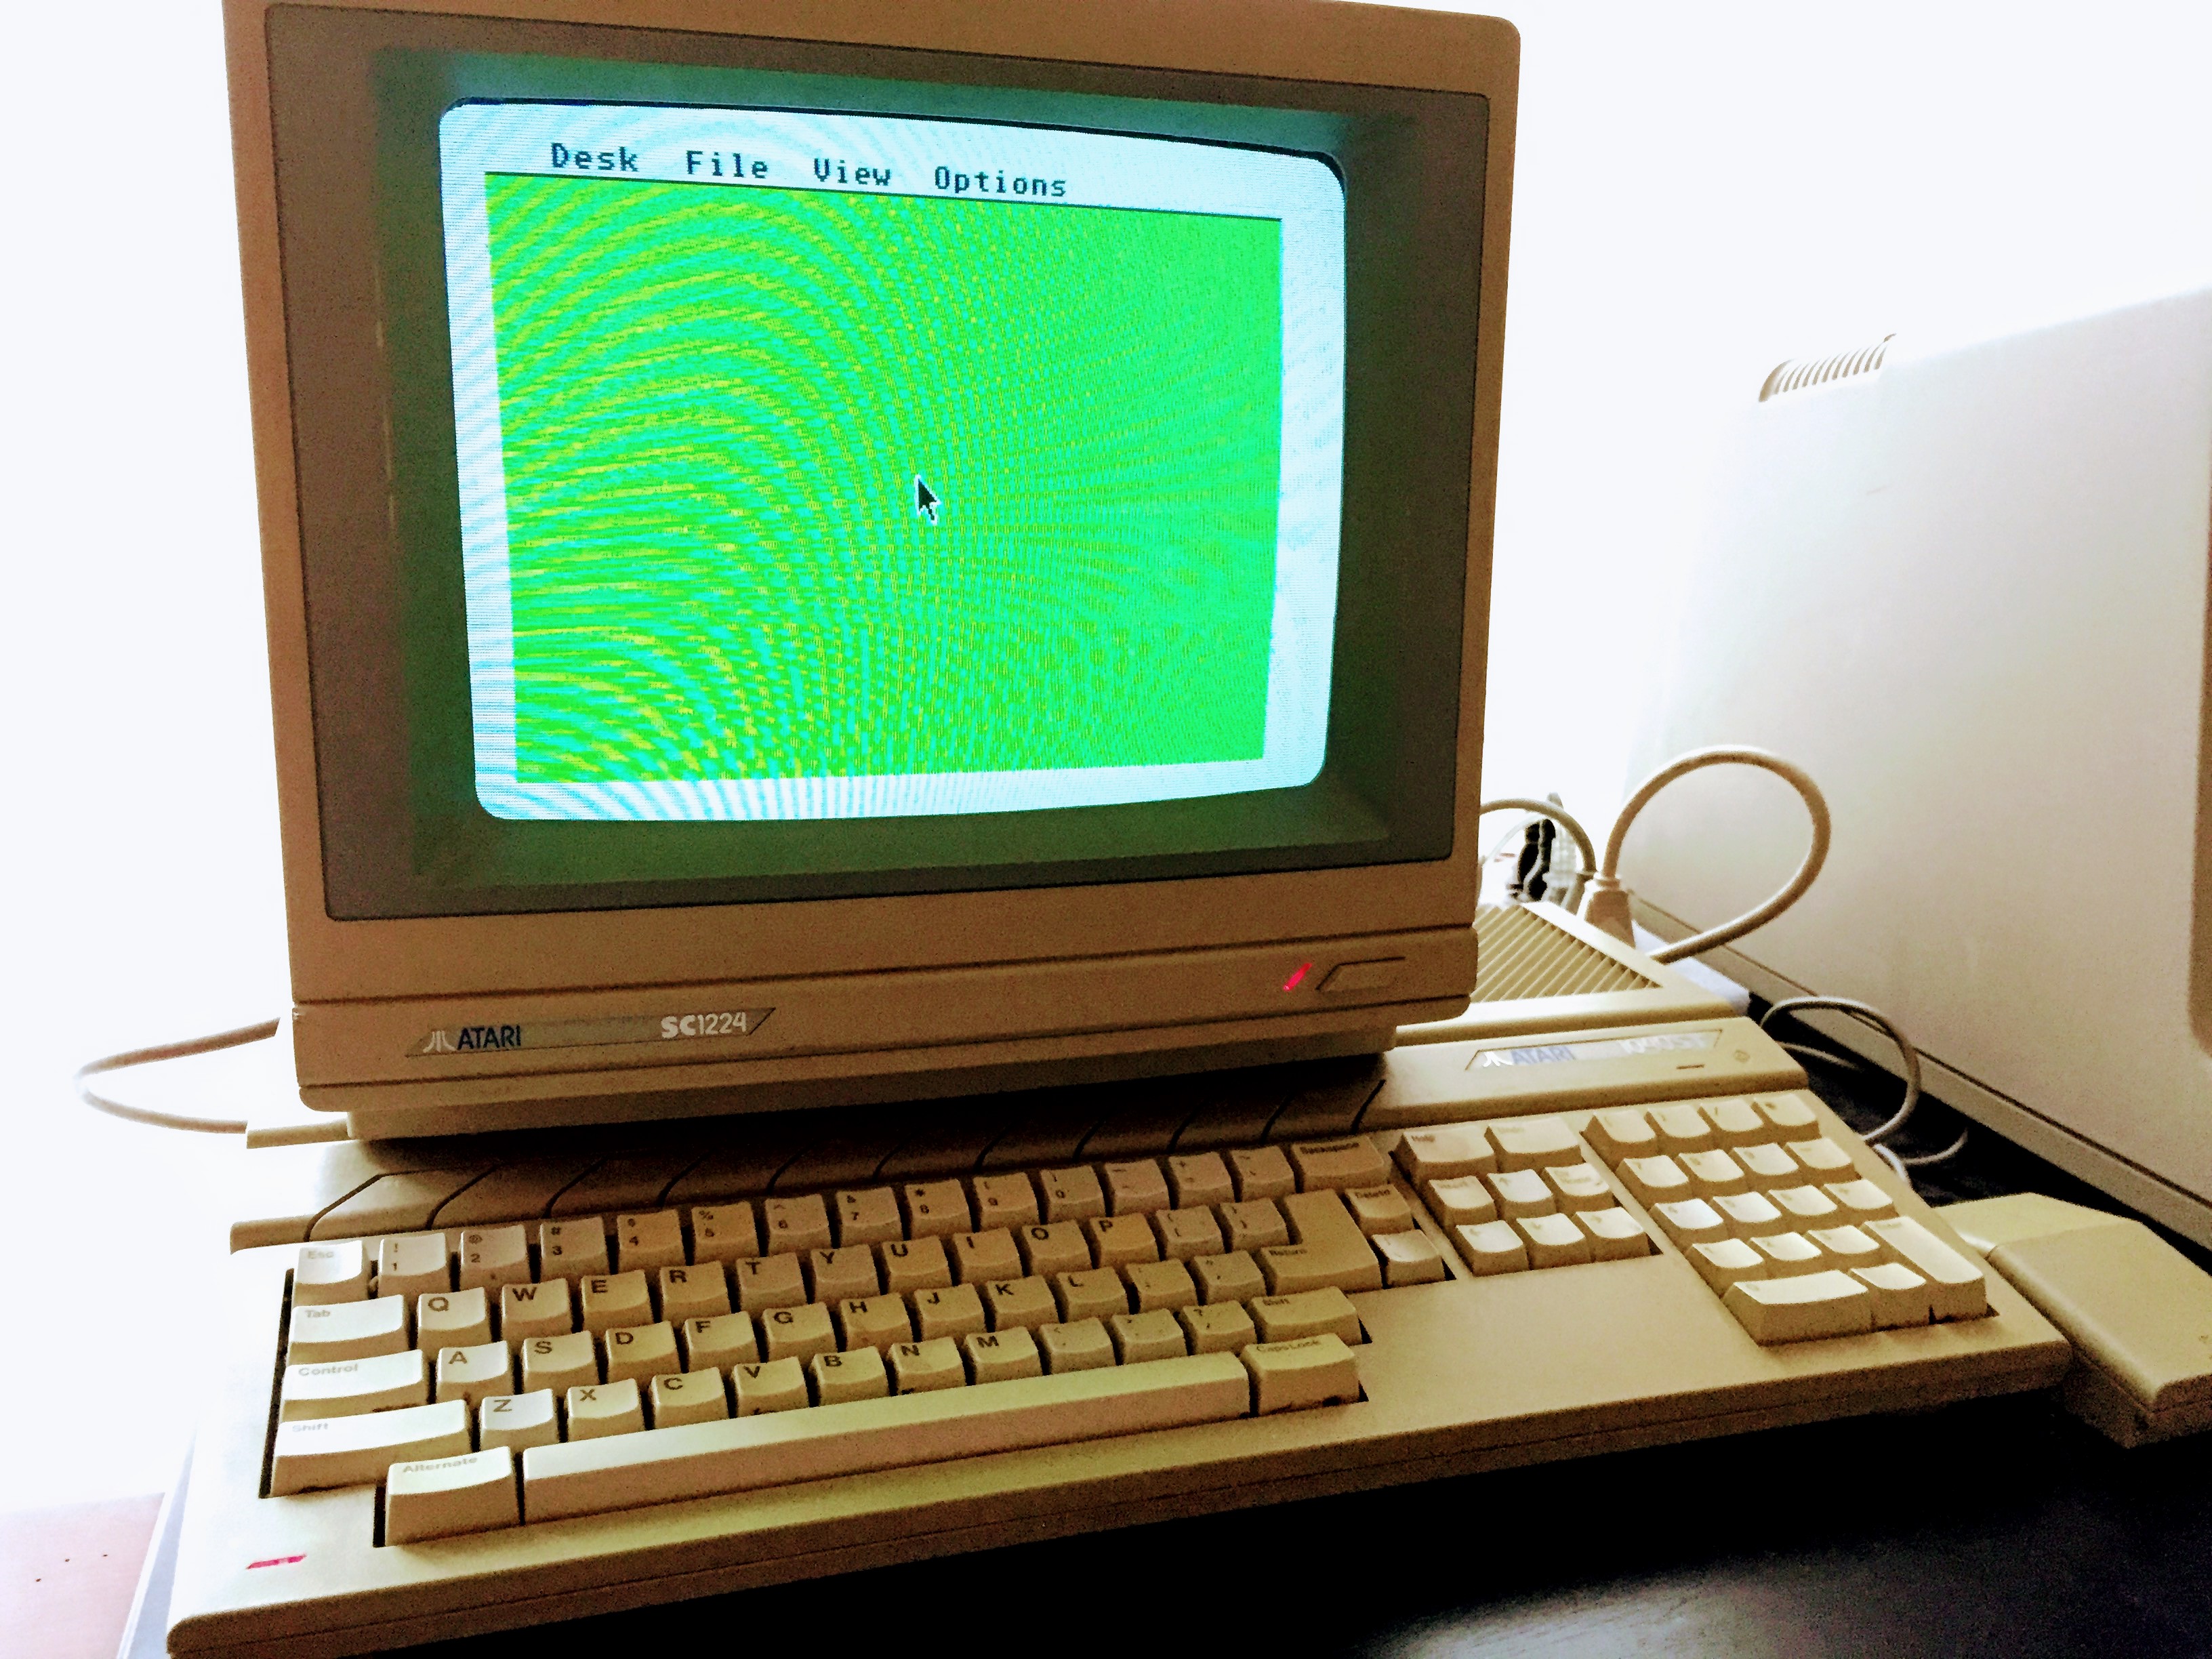
When I pulled it out of the original Atari box it looked a little yellower than I remember but all in all not really in bad shape. I plugged in my Atari SC1224 Color Monitor along with the original Atari Wedge mouse (into the worst designed location for the mouse/joystick ports under the front right corner), popped in a NEOchrome Sample floppy disk (which was more difficult than I remembered with some clunking plastic noises) and I fired it up.
Yay! It still worked! Wait… or did it?
No Trash Can?
While it fired up the screen and booted TOS and the GEM Desktop, something was missing. AH, the disk drives and Trash Icons were all missing from the screen. Hmmmm.
I rebooted it a couple of times and decided to test another disk, but same results. I did notice when trying to insert and eject floppy disks that there seemed to be some mechanical problems with the mechanism making clunking sounds when the button was pushed. So for that first day I had half a victory, the machine powered up but the disk was not responding properly.
So off to Google for some research.
After a day of searching I had come up with a ranked list of likely problems and decided to test them in order to find out what was issue was. My list consisted of the following possible problems:
- Bad Floppy Disks
- Dirty Floppy Drive Heads
- Leaking Capacitors on the Floppy Drive
- Mechanical Problems with the Drive
- Electrical connection problems with the floppy controller chips
First I tested multiple floppy disks I had, all with the same problem (and all being loaded with the same “clunking” sound). Each produced the same problem… no drive or trash icons on the desktop. But by accident I rebooted a couple times with the first disk I had tried and IT WORKED! ICONS!
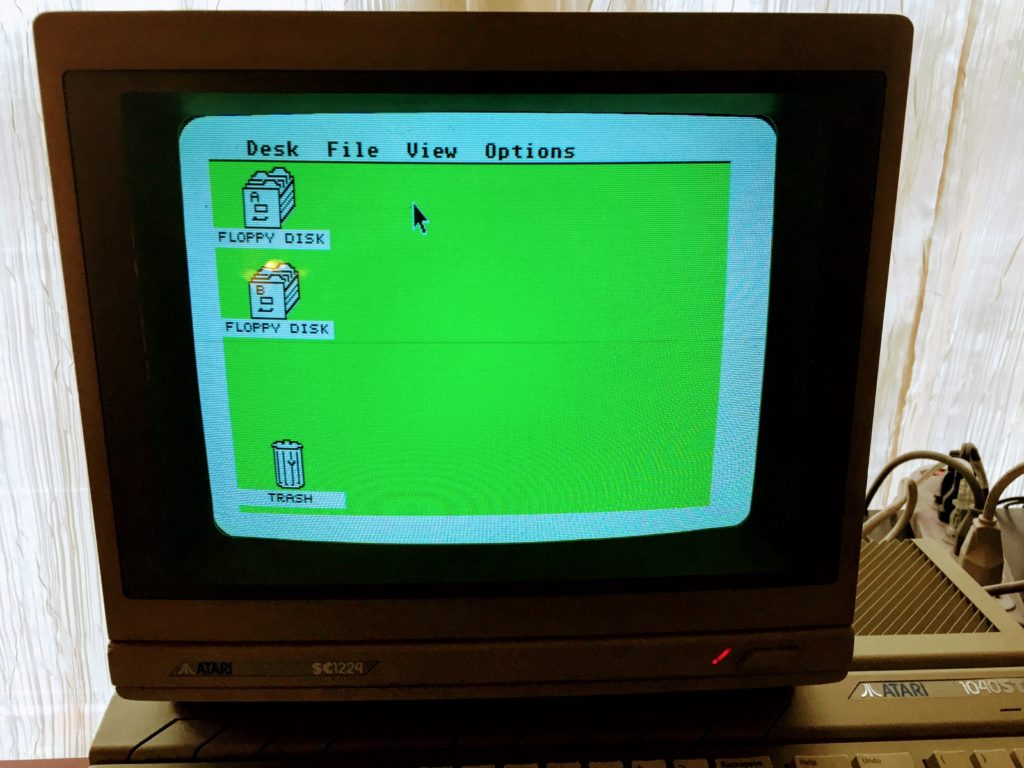
I clicked around, got the directory listing and other basic stuff, what had I done? Why did it work now?
And then as if it was a dream or the last scene from the movie “Awakenings”, it all went away… the next reboot… no icons. *sniff*
Ok, while this was sad, it proved the drive worked, sometimes, somehow. My guess was that it was related to the second item on my list, dirty read heads. So, time to open up this patient and do some minor cleanup.
Open Sez-Meeeee
Opening the Atari ST was pretty simple. I flipped over the computer onto a towel to protect it while I worked on it. With about 10 screws on the bottom (of different sizes, keep track of them as you pull them out) the case separates into two pieces and you can simply lift off the top after you have pulled the screws from the bottom.
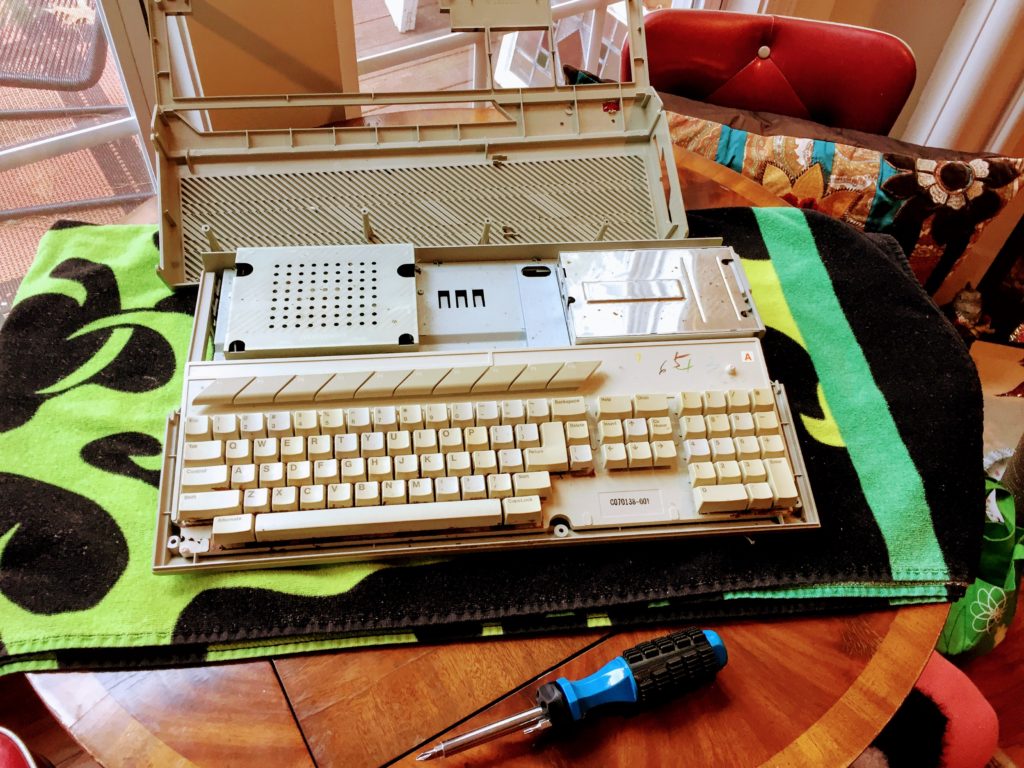
Now my 1040 turned out to be quite disgusting inside with grime and dirt and maybe even a soft drink or two around and under the base of all of the keys. But, unlike my TRS-80 PC project where I had to rebuild the keyboard to get it to work, these keys were all working and so would have to wait until I got the floppy drive working, because a computer that can not run any software doesn’t need a clean keyboard. With that said, I mentally added cleaning the keyboard completely and my first Retrobrite case restoration to my list of projects to get done later this year… fun!
Unscrewing the few screws and unplugging the drive from the power and data cables was pretty obvious… even I could figure it out. 🙂
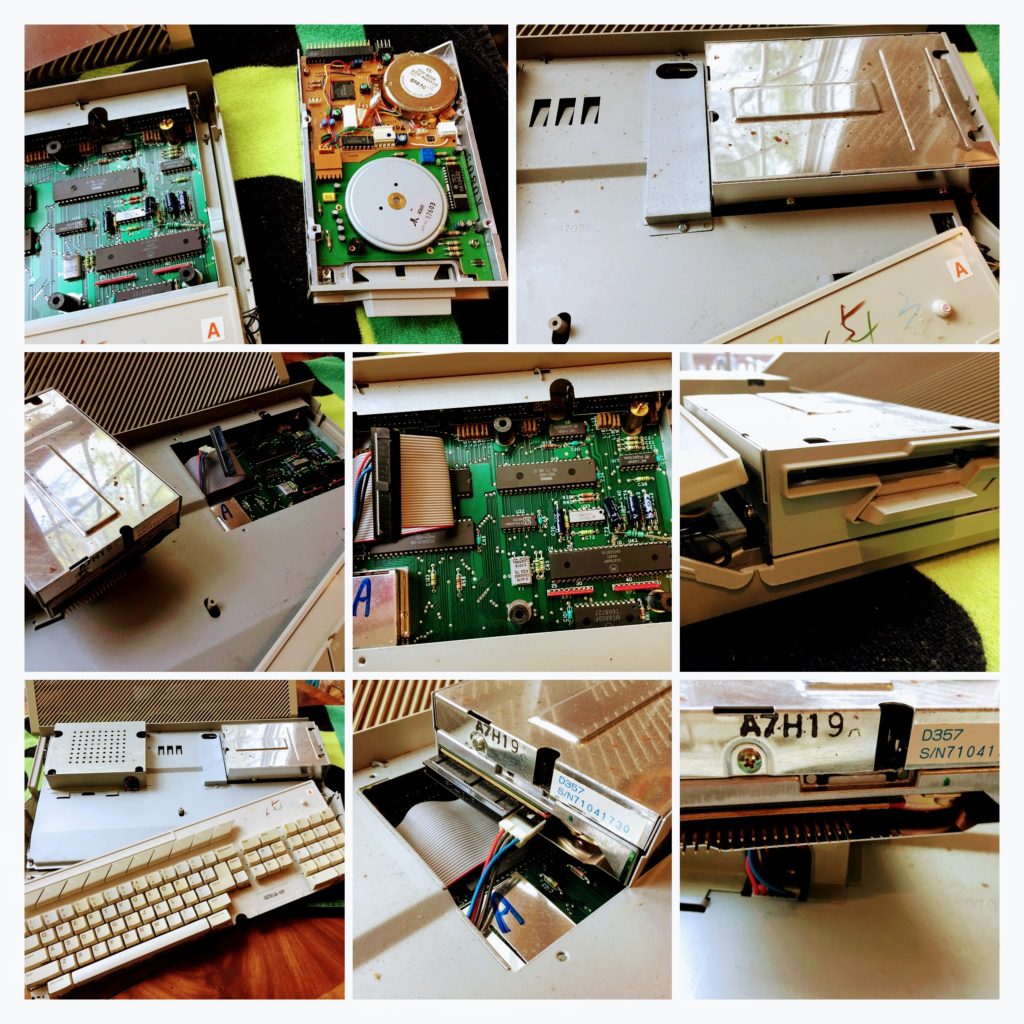
Next my plan was to use some simple household rubbing alcohol and a Q-tip to clean the drive heads and see how it fared after that. Now as easy as it was to get the original drive out of the computer at this point I had 1 stupid screw that I couldn’t get out of the aluminum cover on the drive case. So after removing the easy ones, the final one on the back near the middle I had to leave it and simply bend up the cover to expose the components I wished to clean, namely the 30 year old drive head.

Once exposed I was able to carefully clean the drive heads and close the drive back up. With fingers crossed I booted the machine back up… but alas… no difference. Now while I had it open I inspected the cable connections and the electronic components looking for something obviously wrong, but nothing seemed out of place.
R.I.P. Old Drive
So this left me with mechanical problems I couldn’t fix myself. Thinking I could easily just buy a replacement PC floppy drive and swap it out, I decided to go that rout. That night I ordered an $8 floppy drive on eBay and it arrived a few days later. What I ordered was a Citizen Z1DE-54A Internal Floppy Disk Drive. It looked brand new and I was excited to see if I could finally fix my ancient Atari ST so simply. So I popped out my old drive and dropped in the new one and then without closing the computer, I booted up the Atari to see if the new drive worked.
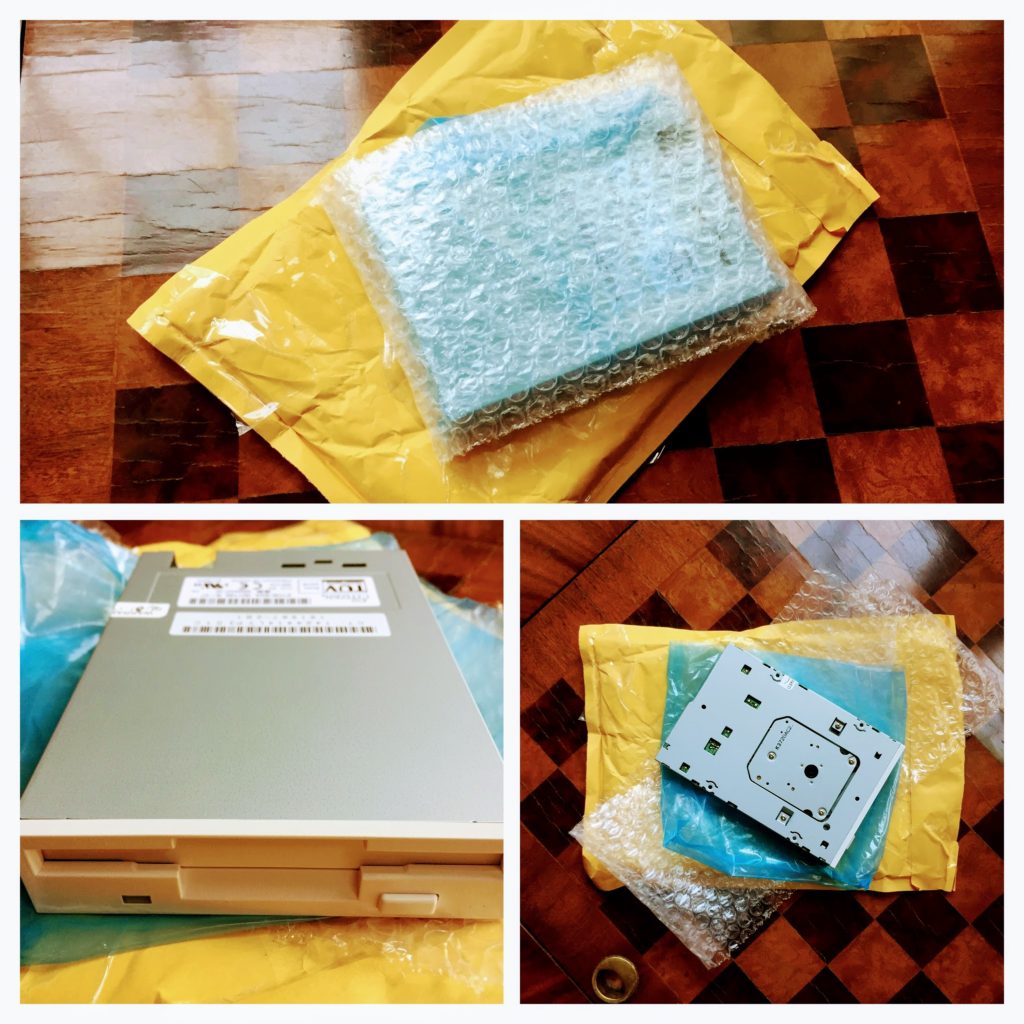
Nope. Drive just spun, no head movement whatsoever which let me know the computer wasn’t even talking to the drive. This led me to the “fine print” I had failed to pay attention to on my many forum and blog readings which warned me of this.
It’s just a jumper setting, HA.
Ok, with the help of many blogs and forums it sounded like I could replace the drive with any PC floppy drive just fine but it turns out that was only kinda true with a minor point that the Atari ST requires the drive to be set with a jumper to act as drive 0, and PC drives default to drive 1. And most of the new-ish drives on eBay were clearly aimed at repairing aging PCs so the drives worked great for them. Worse, this “jumper” which used to be a physical jumper that you simply moved with your fingers, was either now some type of soldering on the drive controller board, or completely non-existent anymore.
Turns out my drive was one that at first didn’t seem to have a jumper, but after a bit of reading online I discovered it may be switchable with some simple solder points to make it think it was drive 0. After a serious amount of online research I stumbled into this Amiga forum thread here that referred to my drive and some ideas on what to try.
To save you some reading, the first thing they recommended was to unsolder the JP10 “Jumper 10” and solder over JP11 “Jumper 11”, seen here in pics from my Drive.
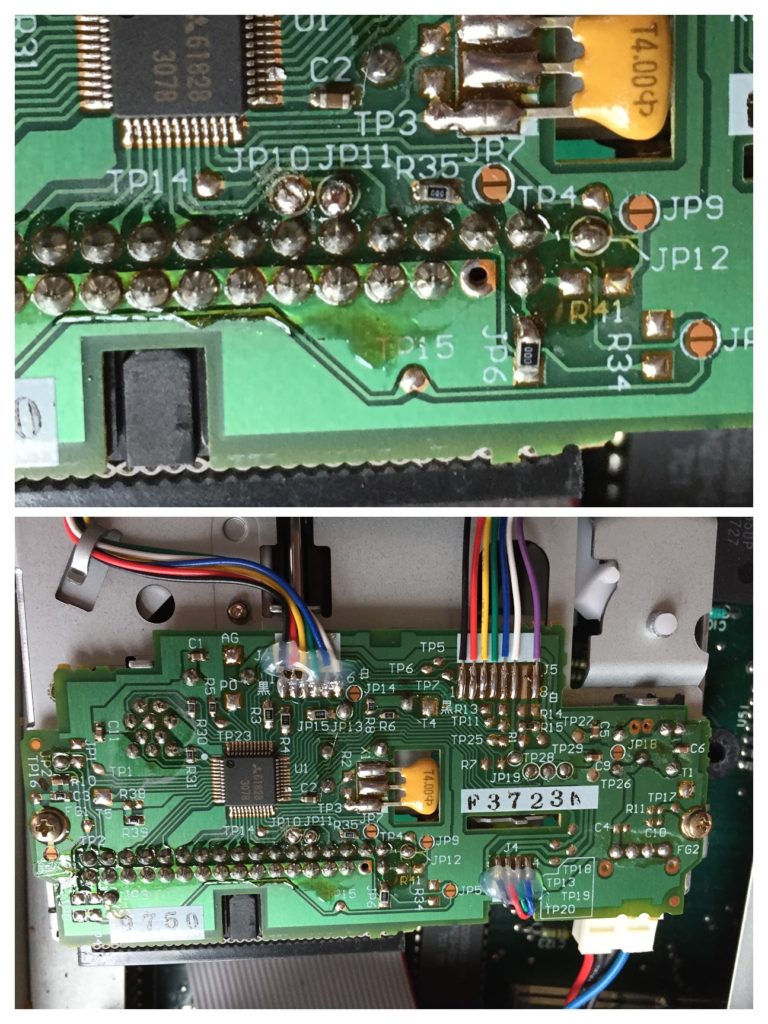
So to my trusty solder station I went with the drive and made the quick solder removal using my solder iron, some solder wick and my solder pump. It took just a couple of minutes and the change was made. At this point I crossed my fingers and hoped it would only take that one change and then work. So again without closing the machine I plugged the drive into the computer and powered it back up. This time it worked!!
It Lives!
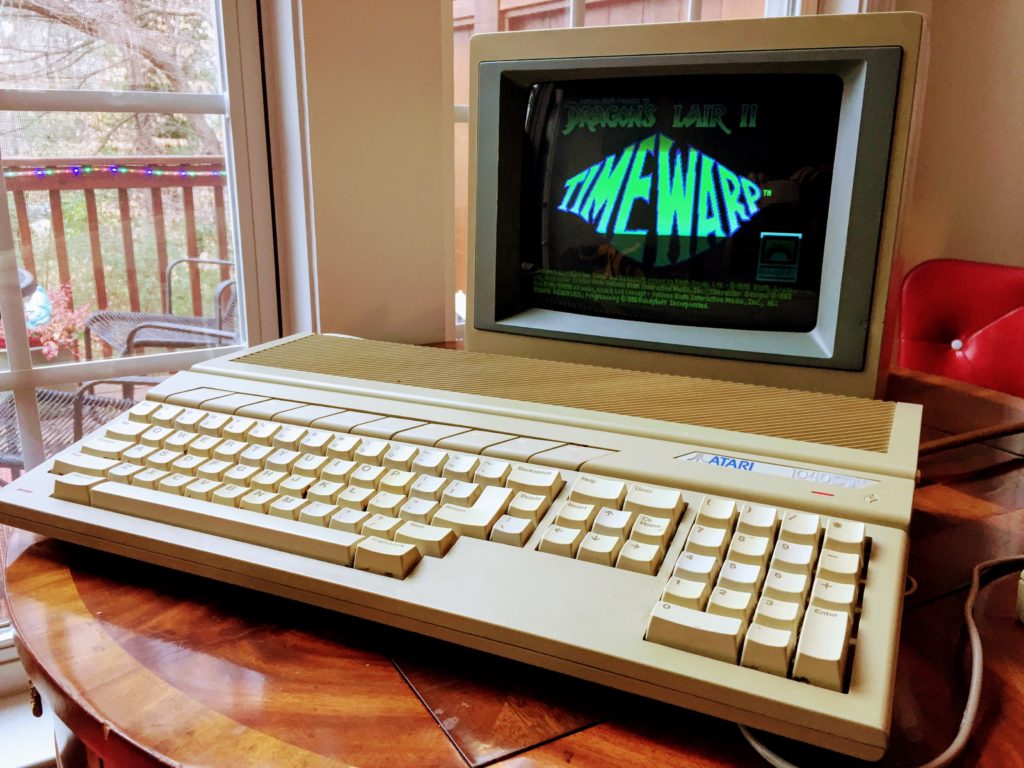
The sound of the head moving to look up the boot sector was a happy sound. This time the icons showed on the screen… and the first game I put in (Dragons Lair II – Time Warp) booted up with glorious Atari color and sound!
Elective Surgery
Now I knew this last step was going to happen when I couldn’t fix the original drive and decided to upgrade to a more modern floppy (ha… modern floppy, that’s funny), but I never worried about it till the drive worked because if it didn’t work, I wouldn’t have to deal with modding the case. But it did work… YAY, but now I had to mod the case… awwwww.
Now I am not a fan of altering original equipment when at all possible unless I am transforming a machine into something completely different, but this time I was stuck having to mod a case on a computer and I wanted to see I could minimize the “damage” of altering the classic case of the Atari ST as much as possible.
While I was able to buy an off-white drive, the color of the Atari ST case is clearly a bit darker. I know that some of that is from the aging computer plastic and some of that should lighten up during my Retrobrite project that I have planned, but for now it is a closer color than a black floppy drive which there were many to choose from on eBay.
But this wasn’t the big problem.
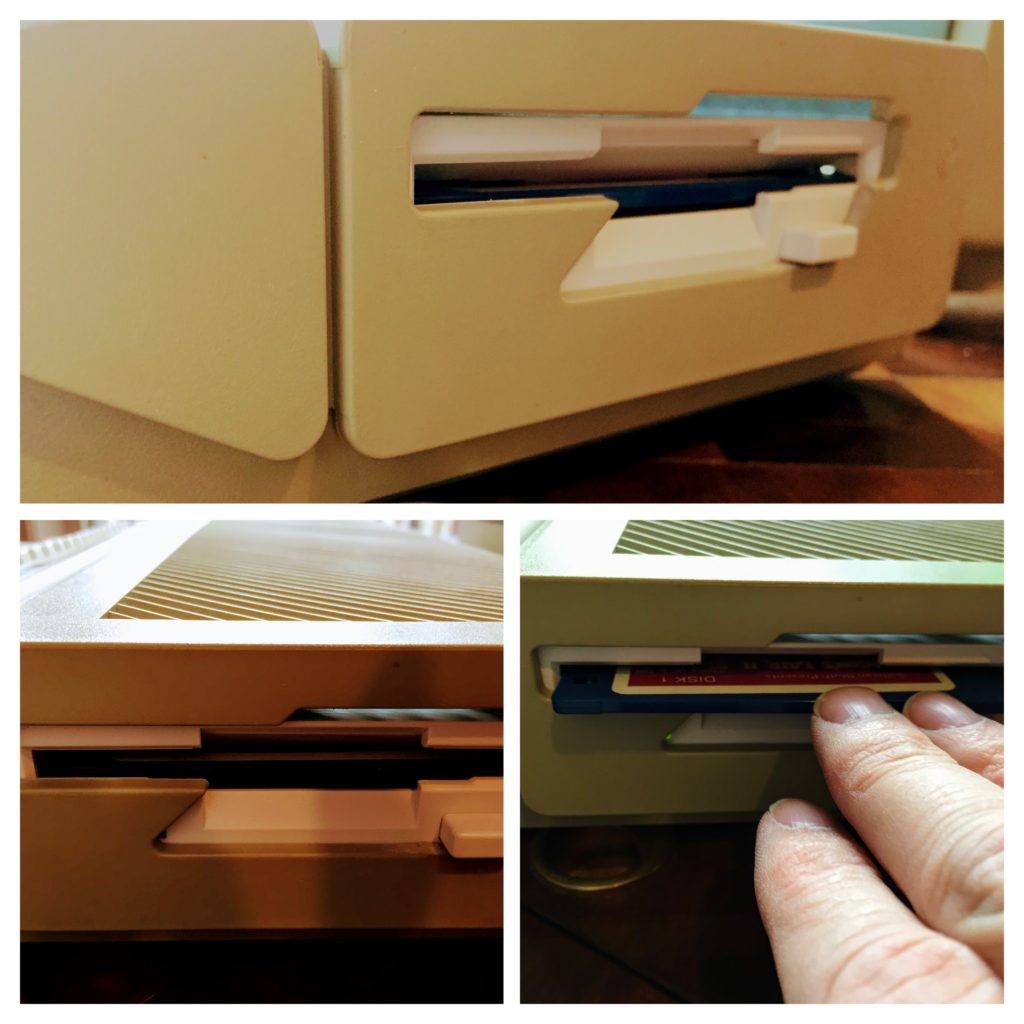
First, newer drives are smaller and don’t fill the space up as you can see from my photos, so I had use some card board material to get it to line up with the opening better.
Second and more importantly, the button the original ST drive was unique in its shape and location with a wide button that had angles that matched the shape of the overall computer. The modern floppy drives have a small push button on the right but when placed in the ST case that button is hidden behind plastic case wall making it impossible to push to release the floppy. So, it would require a slight mod to the case to make room for the button.
This is one of those times when having the right tool for the job is very important. Cutting the plastic on this case could be done in many ways, but the easiest and most accurate is with a Dremel. Choosing a simple grinding bit made carving the shape to match pretty quick, though I won’t be winning any case design awards soon. I marked with a pencil where the button would need to be exposed at, then tried to carefully carve the right side with the same shape to match the left side of the original button opening.
Now for my Master Plan!
With it all working and back together, phase 1 of my plans for this computer are complete. Having a working floppy drive is the start of getting the right software on it to start to connect this machine into other computers I have but also onto the internet (eventually).
For today though I am just glad to have this computer back in the living parked temporarily next to main working computer (My TRS-80 PC) that I run this site from and code on daily.
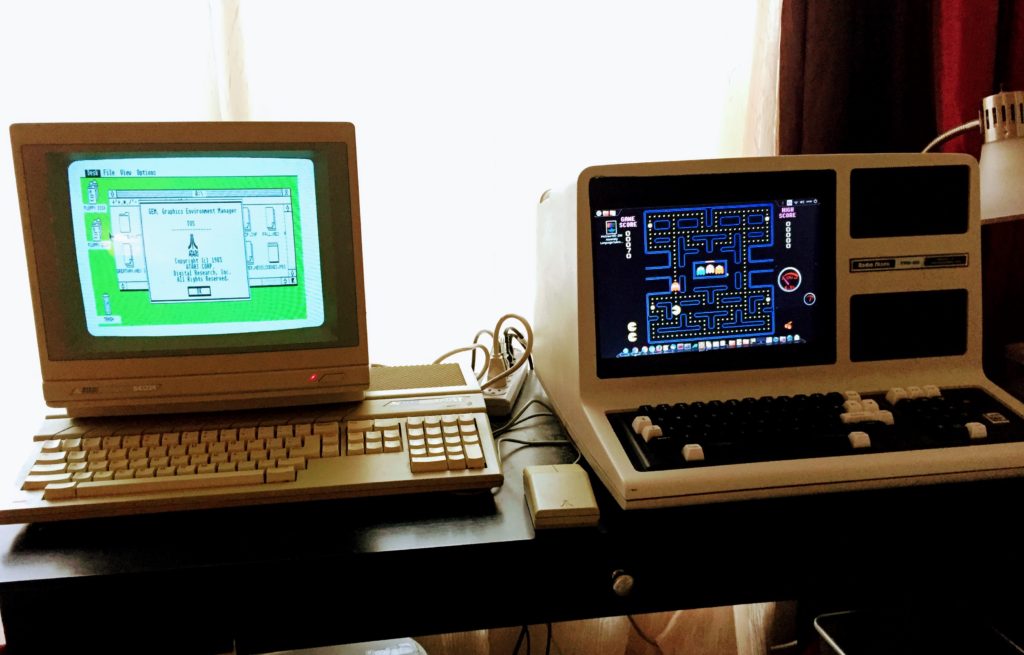 While I am also working on many other classic computer projects (Amiga 1000, TRS-80 Model 4, Atari 800, Mac Classic, Sinclair ZX81, Nextstation) I do have some plans coming up for the Atari ST including:
- Retrobrite rejuvenation for the case and keys coloring
- Connecting to a Serial Cable to a PC to transfer files
- Connecting to online BBS, IRC and other services through a PC
- Building a Wifi module to get the Atari ST on the web via either Arduino or Raspberry Pi
So many fun projects… so little time.


Great post. I’m facing a couple of these difficulties.
This really answered my problem, thank you!
Hi there! This post couldn’t be written any better! Reading through this post reminds me
of my previous room mate! He consistently kept talking about this.
I ‘ll forward this article to him. Fairly confident he’ll have
a good read. Thank you for sharing!
Fantastic!
Just one question: why is it not possible to swap the plastic face panel of the PC drive with that one of the original Atari drive? If my understanding is correct, the only problem is the location and shape of the eject button…
Now I am facing with the same default on my Atari and I really do not intend to cut the original Atari case with a dremel!
Thanks and kind regards,
Yorgos from Hungary
Hi Yorgos,
The position of the button on the drive does not line up with the outer case of the ST. I really did not want to have to alter the case, but the only other choice I saw was to locate a working older ST drive (that may fail soon as well) but my large collection of computers are for use, not storage so I decided it was worth the change.
Let me know what you ultimately come up with as a solution, very big fan of the ST line and its great to hear another collector keeping these historic computers alive and well.
Take care,
Russ
I had the same problem, one thing you could do if you wanted to preserve the internal drive and mechanism is to get an external SF314 drive with the same slanted large eject button to swap in there… One thing I read that might be an issue are capacitors, I plan to replace the ones on mine to see if I can get it to work.
daelwen 6d9e6a7a19 https://wakelet.com/wake/bllPIfU05WG2Qg99Ar-bl
gnewel 00dffbbc3c https://coub.com/stories/4372538-windows-cyberlink-powerdvd-ultra-keygen-full-x64-final-license-iso
melcaid 00dffbbc3c https://coub.com/stories/4322543-virtual-dj-8-2-final-x64-activation-rar-windows-full-version
yulcar 219d99c93a https://coub.com/stories/4299925-martindale-the-extra-pharmacopoeia-61-epub-free-zip-download-book
nelsrana 219d99c93a https://coub.com/stories/4233029-srv-bangla-x64-cracked-pc-latest-free
aleehel 219d99c93a https://coub.com/stories/4368549-igo-primo-iso-key-full-version-professional
eldkame 219d99c93a https://coub.com/stories/4239753-maya-lt-2007-en-exe-activator-final-pc-serial-full-64bit
eliven 219d99c93a https://coub.com/stories/4300583-elise-graves-infernal-restraints-64-free-pc-download-rar-license
nedrelly 219d99c93a https://coub.com/stories/4349543-error-w3lh-dll-warcraft-3-rar-64-windows-free-file
intwebs 219d99c93a https://coub.com/stories/4247726-af-antares-microphone-mo-keygen-key-download-iso-file-windows
vaneila 219d99c93a https://coub.com/stories/4281868-ultimate-ca-nce-orcad-pspice-v-9-2-1-pc-x64-nulled-key
samsaly 219d99c93a https://coub.com/stories/4271161-aparichit-torrent-dual-subtitles-2k
naomsane 219d99c93a https://coub.com/stories/4383350-ultimate-solucionario-calculo-serial-rar-pc
nicque 219d99c93a https://coub.com/stories/4325586-1080-camfrog-pro-6-4-movie-dvdrip-mkv-mkv
crisfot 219d99c93a https://coub.com/stories/4300625-32bit-xf-adsk-zip-windows-crack-torrent
kamald 219d99c93a https://coub.com/stories/4299802-zip-campus-journalism-by-cecilia-cruz-free-ebook-mobi-download
wainbaku 219d99c93a https://coub.com/stories/4291581-ulead-pho-x64-serial-iso-full-build
felbord 219d99c93a https://coub.com/stories/4285105-build-nenitas-me-keygen-registration-utorrent-pc
augustow pensjonat mb http://www.noclegipracowniczneaugustow.site
pokoje augustow centrum noclegi augustow booking
corals illhumoured extinguishment https://www.noclegipracowniczneaugustow.site/34rjhs6996yz.htm
stx21
yoozlat d9ca4589f4 https://wakelet.com/wake/3bt7InhQ9PPISWo4zBt9x
amanai d9ca4589f4 https://wakelet.com/wake/2iSP_P3abajKnCYfVNKEr
blasjaim d9ca4589f4 https://wakelet.com/wake/lvagvQhZbjsjcwvfJdwZq
laursaa d9ca4589f4 https://wakelet.com/wake/STKLiYWWvOD6X3owUFztV
nicmarn d9ca4589f4 https://wakelet.com/wake/IrXJPw6jTsyfqi3VXaE66
leanhar d9ca4589f4 https://wakelet.com/wake/0CMaNmsFOjOqtKKQ48rVL