
 Time to disassemble this TRS-80 Model 4 and figure out all of the problems I have to solve. I already figured out:
- the CRT bezel is cracked
- the keyboard is missing a couple of keys
- the remaining keys have a connection problem and don’t work
- the case is very dirty and grungy
So the first step was to move this thing from the family dining table to a more suitable place for the computer open heart surgery.
Opening the case was not too difficult though there were quite a few screws, 10 on the bottom of different sizes and one on the back of the unit. The one big thing I knew from a lot of reading and videos was to be VERY careful when removing the top case from the bottom was to lift slowly and feel for resistance from wires catching on the back of the CRT tube. The problem was that my unit was a 64K RAM unit with no disk drives. Instead my unit had plastic covers in place of drives.
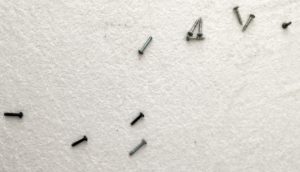
Case screws for TRS-80 Model 4
This was not a problem for what I planned for the machine, but it was a problem when using the technique everyone suggested to avoid issues while lifting the top which was looking through the drive hole. Without a drive, there was no hole to see through and avoid the wires being caught on the CRT. Instead I had to use simple resistance to determine whether there was a problem. With that said, it was not too difficult to close my eyes and use the force to move it slowly up, left and right till I finally was able to lift the top off safely.
Lifting the top off I hoped the cracked bezel wouldn’t give out and drop the CRT which could be disastrous with a CRT Implosion.
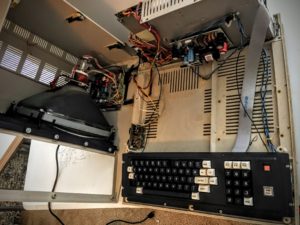
Inside of the TRS-80 Model 4
With some good luck I got the top off, turned it sideways and set it back down. Looking at the inside I could see that the top of the computer is connected to the bottom with two connectors, one for the main power to the CRT and the other for the card to control what gets displayed on the display.
Because this was a drive-less machine there is a lot of open space on the right side of the unit with a simple cable connecting the keyboard back to the main computer motherboard which is mounted vertically against the inside back of the system.
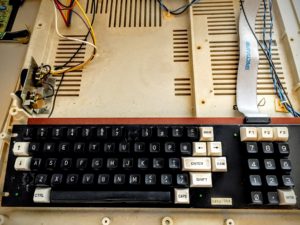
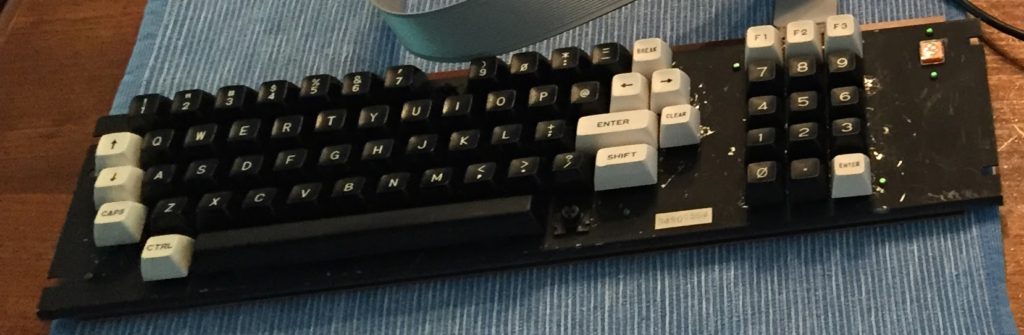
TRS-80 Keyboard has missing keys and bad connections
Next step was to take out the few screws holding the keyboard in so I could figure out what it was going to take to clean and rebuild the key contacts. Flipping over the keyboard it became clear that it was not something obvious like a disconnected trace on the printed circuit board, more likely it is just the case of dirty contacts on each key, which doesn’t sound like too much work. (Ha!)

Keyboard PCB for TRS-80 Model 4
So my next step is to remove all the keys and get

TRS-80 key caps
started cleaning the contacts. First step is to flip the keyboard back over and carefully pop the plastic key caps off. While it is scary on the first couple of them (didn’t want to break any of the key mechanism below each cap), it becomes clear that its a simple case of leverage with a small screw driver.
Once the keys are off it becomes a larger challenge because the keys are individually soldered into the PCB. So at this point I turned on my solder station and flipped over the keyboard PCB again.
![]()
 Now this solder is 30 years old and took a bit more heat and time to melt each of the 4 contacts from the board. Using my desoldering pump I carefully heated each contact and vacuumed up as much of the solder as possible before trying to pull the key component out. The surprising thing was the amount of solder that I pumped out, creating solder plugs all over my desk. Nothing like 30 year old toxic lead everywhere… yay! But, even with that amount of solder out it was a bit more work to get the key components out of the keyboard unit.
A small flat screwdriver on the other side allowed me to first push in the plastic notches on the sides that hold the keys into the keyboard base. Then a bit of solder flux and my soldering iron rotating heat to each of the four contacts with a bit of rocking the key component (carefully) back and forth till it popped out.

De-soldering individual key mechanisms for TRS-80 Model 4 keyboard
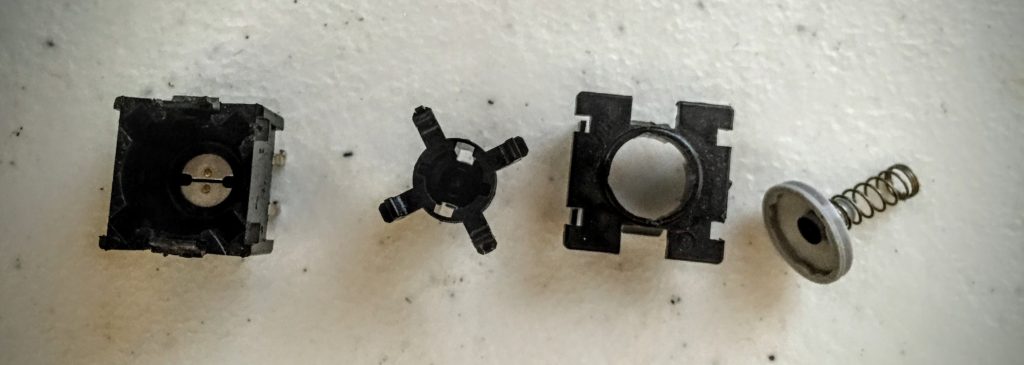
Each key is a simple mechanical component made up up 4 basic parts:
- Base – mounts in the keyboard unit, is soldered to the PCB and has the electrical contacts that the plunger connects with when the key is pushed.
- Key cap post – plastic piece that connects the Key cap to the key mechanism and pushes down on the spring and plunger.
- Key component top – holds the pieces into the base from the top. Be careful with the tabs on this piece as the keys wont work if they are not held together by this piece.
- Spring & Plunger – The plunger has a rubberized electrical piece that when it reaches the bottom of the base, connects the two sides of the electrical contacts within the base which sends the signal for that key to the CPU. The spring sits on the plunger and fits inside the key cap post.

Multi-meter to test key components
Breaking out my trusty multi-meter I tested all the connections, across the base poles, across the inside connections, and especially the black conductive disc below the plunger. Many of the keys seem to have worn or discolored discs.
To try to avoid any problems later down the road, I decided to clean and test every key, regardless if it already worked fine or not. Then I would be able to put the keys into two piles, those that worked fine and those that needed some further repair to make them work reliably.
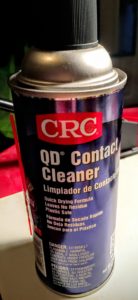
Cleaning consisted of using CRC spray contact cleaner. I took the parts to a well ventilated area in disposable paper bowl and sprayed the insides of the base and cleaned each one repeatedly with a cue-tip. Some of them required a bit more elbow grease than others, but generally not too bad a task (other than the smell of the cleaner).
 I also cleaned the conductive material inside the rubber plungers to make sure the buildup of 30 years of dust, dirt, smoke, grime and whatever else didn’t affect the contact quality. I did the keys in batches of 5 or 6 such that I could determine if the cleaning worked or if I needed to adjust my technique or amount of cleanser. Each time I disassembled a key into its 5 parts, then took the bases and plungers away to clean them.
Once cleaned and dried, I re-assembled the group of 5 keys and re-tested each with the meter. Those that tested high on connectivity were put into a pile of “good keys” while the iffy ones were put into a smaller pile of keys that needed more work. In the end there were less than 10 keys that needed additional cleaning and TLC.
After a second level of cleaning on those iffy keys I had only 2 keys that didn’t work well, in fact one did not work at all. After testing these 2 keys a bit more I confirmed it was the black conductive material within those key plungers that was the problem. After a bit of googling I did not have any inexpensive and reliable ideas to fix this. These buttons were so old and worked differently than those of modern keyboards so it limited my options on how to fix this.
So I broadened my searches to include other “buttons” people had fixed and this is when I stumbled into a post about someone fixing an old TV remote control that worked similar to my keyboard keys. The TV remote used a similar black rubber conductive material and that was the key (pun intended). I realized I had in my magical box of wires (doesn’t every guy have one of these?) a few old remotes for devices I no longer have (you never know when you are gonna need a remote, right?). Anyway, I opened the first one and it was not a match for the problem, but the 2nd remote I opened up was! Inside was a rubber pad of this material for every button. I took out my trusty X-Acto knife and sliced off a disc of the same size as what I needed then proceeded to cut off the old conductive material from my button plunger. A bit of super glue later and the plunger made the proper contact with the base. Crisis averted!
Next was a simpler process to solder the keys back into the keyboard PCB. With that said I did deal with two other issues.
- Using the best keys (mechanically and electrically) for those key positions that would be used the most, and saving those keys that either had minor damage from them being extracted on those keys that were low usage (such as caps lock, number pad keys and function keys). This would ensure I reduced any chances of having to redo all of this work again anytime soon.
- Repairing a couple of electrical traces that got cut, ripped or damaged when the keys were being removed from the PCB. This took a little bit of time with my multi meter but ultimately only required a couple of jumper wires to reconnect over the cuts and make it all work fine.
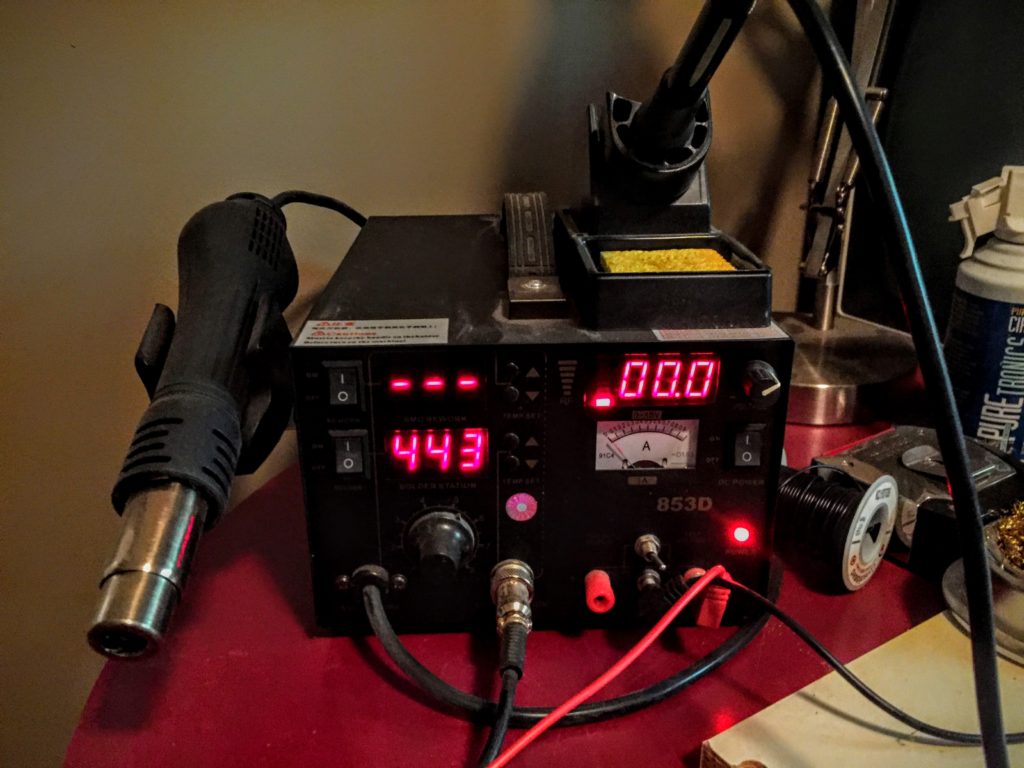
My solder station wasn’t very expensive but it provides some great features that I really love. The ability to dial up the irons temperature is one of the main features, but when you need to heat up something such as an area, the hot air rework air gun is fantastic. This proved helpful from time to time on this project as I needed to remove some old components.
In addition to the solder side of the station I leveraged the other side which includes a meter and more importantly a DC voltage power supply which allowed me to test components under controlled voltage situations.
Re-soldering the keys back in took a bit of time and I highly suggest you use a solder fume extractor as the amount of time you could be exposed to the fumes is not healthy. My fume extractor is not expensive and it is a nice compact fan that pulls the fumes coming off my soldering iron through a filter so I can keep focused on the job at hand without the risk of inhaling anything toxic.
Re-built TRS-80 Model 4 keyboard
While still missing some key caps all of the keys functioned which meant I could go to the next step in this project. What was next included:
- Get a computer and screen that would become the new heart of my TRS-80 shell.
- Re-build the case to fit and install a flat screen monitor where the monochrome CRT once was.
- Connect up the original keyboard (which I just rebuilt) to the modern computer via some hardware / software solution.
So far it was all going relatively smooth!
octalat 6d9e6a7a19 https://wakelet.com/wake/4MAZ3ThtUjOZd2TJ3ll7n
elleode 00dffbbc3c https://coub.com/stories/4331416-blu-ray-mumbai-police-4k-subtitles-watch-online
jaiemma 00dffbbc3c https://coub.com/stories/4285564-32bit-mertua-menantu-selingkuh-jav-hihi-file-windows-iso-registration-crack
weyyama 219d99c93a https://coub.com/stories/4290251-boom-3d-1-1-6-pro-full-zip-crack-registration-x32-osx
berind 219d99c93a https://coub.com/stories/4234711-license-otsav-dj-pro-1-90-latest-download-full-pc-x32-serial
strral 219d99c93a https://coub.com/stories/4351569-mobi-kisah-perang-baratayuda-zip-torrent-ebook-free
carpri 219d99c93a https://coub.com/stories/4264489-activator-realtek-high-rar-64-windows-keygen
illkaf 219d99c93a https://coub.com/stories/4305548-simfox-key-torrent-keygen-windows-64bit
innikat 219d99c93a https://coub.com/stories/4356224-full-version-weird-park-broken-tune-ce-64bit-windows-download
innevla 219d99c93a https://coub.com/stories/4259580-revit-2019-mem-4k-mkv-full-full-watch-online-torrents
granelby 219d99c93a https://coub.com/stories/4287626-kiko-loureiro-guitarra-patch-license-rar-software-full-pc
andtrea 219d99c93a https://coub.com/stories/4323641-haeundae-tsunami-watch-online-torrent-free-movie-subtitles-watch-online-english
nehesail 219d99c93a https://coub.com/stories/4266514-ultimate-iq-view-3d-download-pc-crack-free-iso-key
miryes 219d99c93a https://coub.com/stories/4384338-book-elementary-linear-algebra-howard-an-n-10th-solution-checked-full-epub-utorrent-rar
wethkeal 219d99c93a https://coub.com/stories/4312982-twilight-ren-utorrent-pc-key-zip-32-full-cracked
tabval 219d99c93a https://coub.com/stories/4292116-win-pro-24-windows-ultimate-32bit-patch-full
winaddo 219d99c93a https://coub.com/stories/4284812-quantum-qhm-7468-2v-game-pad-driver-windows-utorrent-activator-32bit-full-ultimate
nicegab 219d99c93a https://coub.com/stories/4289884-electrical-machines-1-by-bakshi-ebook-full-version-rar-torrent-epub
desmnere 219d99c93a https://coub.com/stories/4260296-essentials-of-psychology-jeffrey-nevid-epub-download-zip-full-edition-ebook
janfal d9ca4589f4 https://wakelet.com/wake/WfZMgsr6jbe1_04RiYl3f
celebene d9ca4589f4 https://wakelet.com/wake/LWVD93xw4DXJtdnB1WUO-
wanxito d9ca4589f4 https://wakelet.com/wake/fB5fTqvI2VmwAdl2GiSEA
nivdae d9ca4589f4 https://wakelet.com/wake/0iuWtY66d0E7tT4hlDw-5
ambgon d9ca4589f4 https://wakelet.com/wake/q7LR6yMJKuI1VyV0RIaqc